Development environment
For evaluation and development a development environment with a preconfigured example setup is provided. It includes preconfigured instances of the Voxit API Servers, the Voxit reference frontend, all Polis services, a PostgreSQL database, Keycloak (OpenID Connect identity provider), a pgAdmin (database frontend), and Maildev (SMTP test server).
Setup
Clone the voxit-docker repository including its git submodules if needed:
git clone --recurse-submodules https://gitlab.com/voxit/voxit-docker.git
If you have already cloned the voxit-docker project itself, check out the submodules:
git submodule update --init
Running the container environment
Ensure that you have installed Docker and that the Docker daemon is running.
Run the following command to build and run the containers:
cd voxit-docker && docker compose --env-file dev.env -f docker-compose.yaml -f docker-compose.dev.yaml up
For development purposes (see Development below) it is recommended to use Docker Compose Watch by running the following command instead:
cd voxit-docker && docker compose --env-file dev.env -f docker-compose.yaml -f docker-compose.dev.yaml up --watch
Services
The following services are made available:
| Service | URL | Comment |
|---|---|---|
| Polis frontend | https://polis.voxit.internal/ | Sign up for a new user account in order to add conversations |
| Voxit API server | https://voxit-api.voxit.internal/ | |
| Voxit administrative API server | https://admin-api.voxit.internal/ | |
| Voxit reference frontend | https://www.voxit.internal/ | Participation frontend will ask for a conversation identifier from the Polis admin frontend |
| Voxit administrative frontend | https://admin.voxit.internal/ | |
| Static files | https://www.voxit.internal/static/ | Static files (e.g. a custom frontend) synced from a user-defined location (defaults to ./static) |
| Keycloak | https://idp.internal |
|
| pgAdmin | https://pgadmin.internal |
|
| Maildev | https://maildev.internal |
Configuring your web browser
The development environment simulates a deployment scenario where the Polis and Voxit frontends, the Voxit API Server (and all other services) are served from different subdomains via HTTPS in order to allow for testing CORS. DNS resolution is provided accordingly and no services except a SOCKS5 proxy are directly exposed to the host. Web browsers and other HTTP clients must thus be configured to use the SOCKS5 proxy listening on port 1080 in order to access any of the services attached to the Docker network and also use this proxy for DNS resolution. When the Docker compose environment is started for the first time, self-signed certificates will be generated for all of the above services. Make sure to visit all of them and add exceptions for them in your browser.
Chrome
The Chrome web browser must be started with the following command line options in order to use the poxy listening on localhost: --proxy-server="socks5://127.0.0.1:1080" --host-resolver-rules='MAP * ~NOTFOUND, EXCLUDE 127.0.0.1'
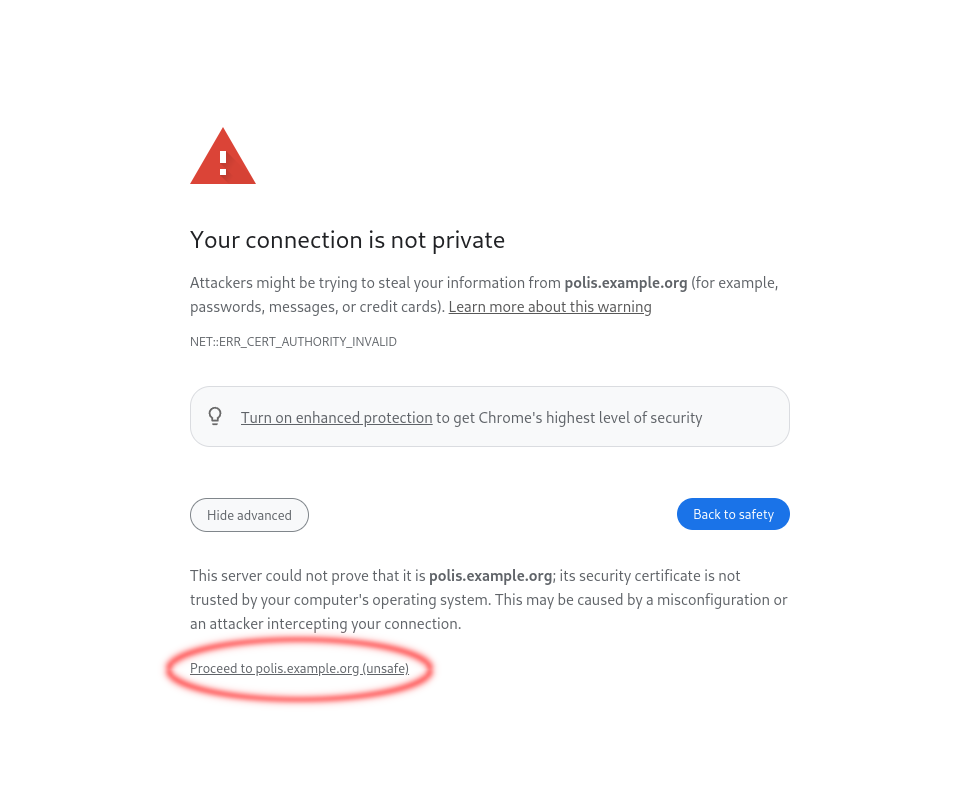
When visiting any of the above URLs for the first time you will need to add an exception for the self-signed certificates as follows:
Firefox
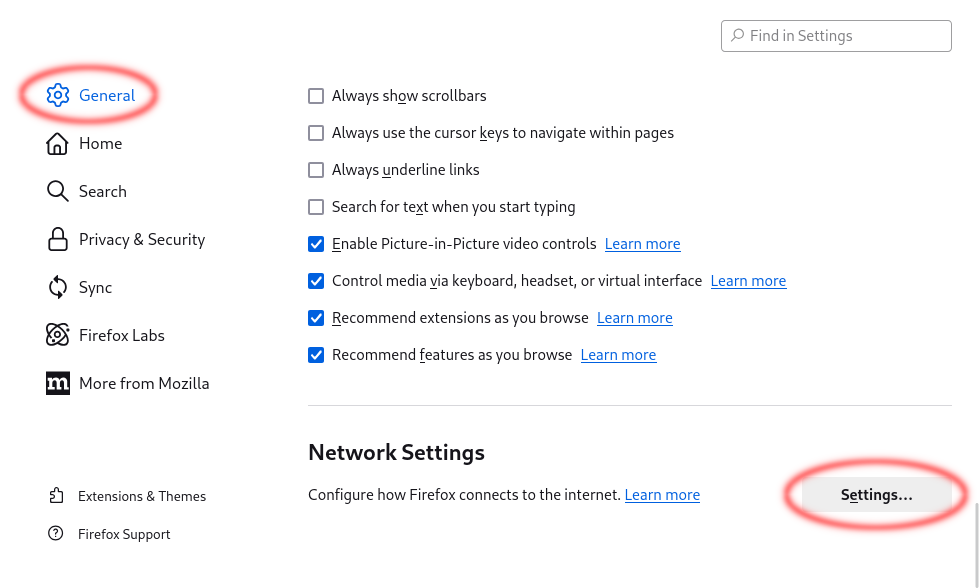
In Firefox open "Settings" from the menu, in the "General" panel go to the "Network Settings" section and click on the "Settings…" button.
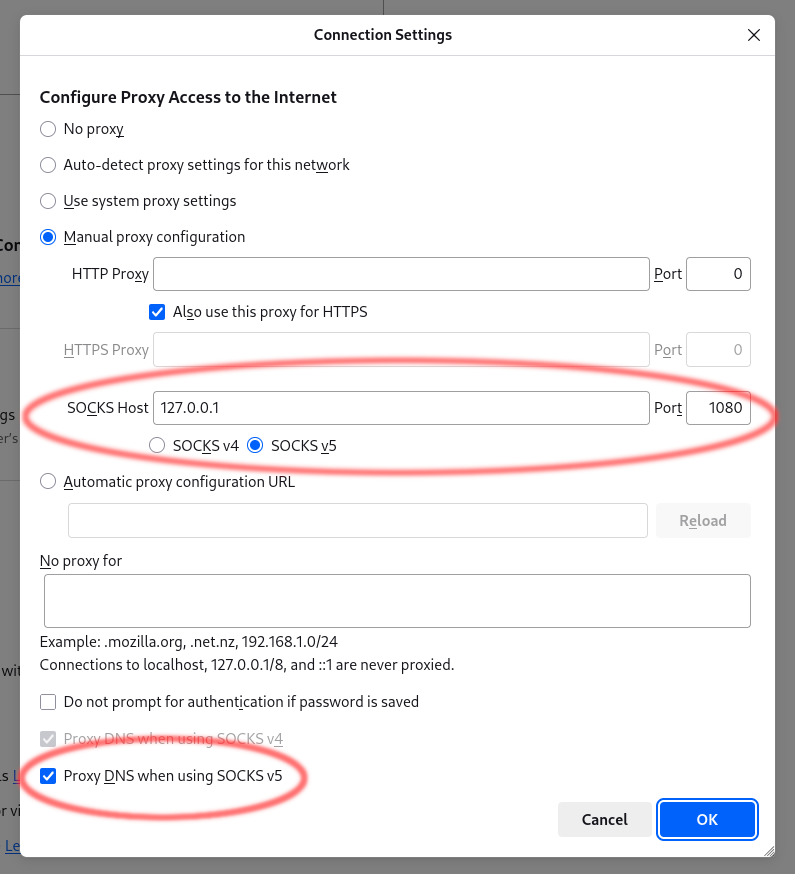
Select "Manual proxy configuration" and fill in "127.0.0.1" as the "SOCKS Host" and "1080" as the "Port", select "SOCKS v5" and "Proxy DNS when using SOCKS v5" below.
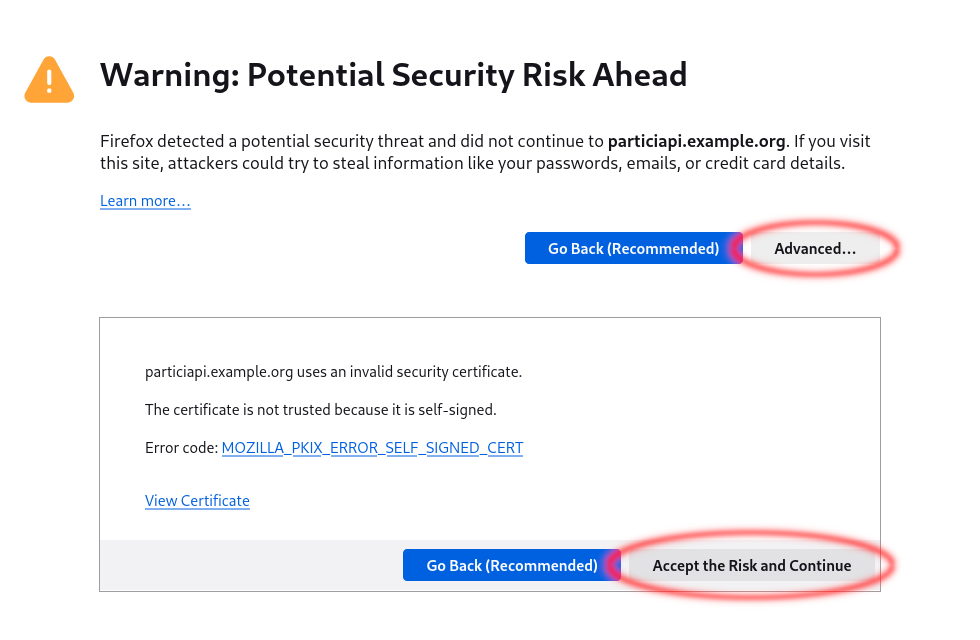
When visiting any of the above URLs for the first time you will need to add an exception for the self-signed certificates as follows:
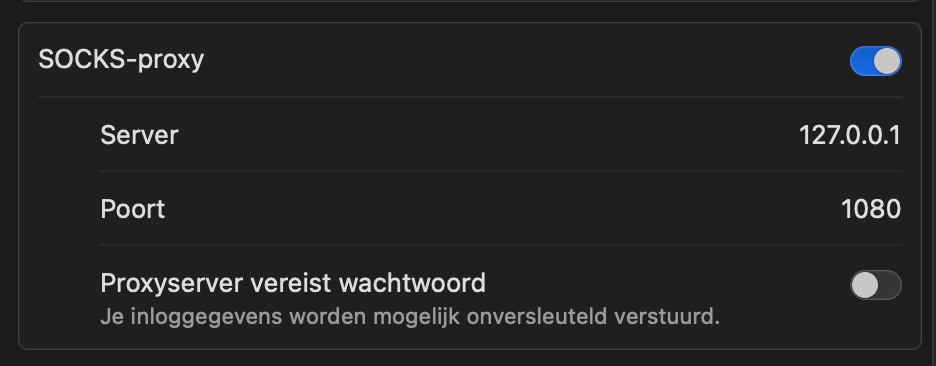
Safari
In Safari open "Settings" from the menu, in the "Advanced" panel go to Proxys than choose "Change Settings" as follows:
Development
For development purposes it is recommended to use Docker Compose Watch which will sync changed code into the respective container, trigger build processes and even rebuild and restart containers if necessary.
This means that you can edit files in any of the Voxit projects which are checked out as submodules below the subprojects/ directory (Voxit API Server, Voxit Web Client, Voxit Web Components, Voxit Reference Frontend) and changes will take effect immediately.
In order to develop a branded frontend based on Voxit reference frontend you can take the example-frontend/ directory or the Voxit example frontend as a starting point and point the VOXIT_FRONTEND_DIR variable in your .env file to it. Any changes will trigger a rebuild of the frontend and changes to package.json will trigger a rebuild of the container ensuring npm dependencies are up to date.